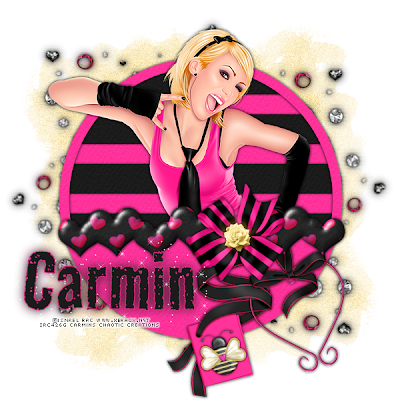
This tutorial is for those that have a working knowledge of PSP. This tutorial was written by me on the 7th day of August 2010 and any resemblance is purely coincidental. I used PSP 9, but any version should work. I do not allow my tutorials to be translated and please do not claim them as your own. If you would like to share the tutorial please send a link to my blog.
The materials you will need:
• Scrap kit: I used Juicy Bits Love Buzz Kit which you can find here
• Tube of choice: I am using the work of the talented Ismael Rac You must have a license to use his work and you can get one here
• Template: Im using template103 by Missy. You can download this template and many others here
• Eye Candy 6 Bevel
• Mask of Choice: I used WSL_Mask254 which you can get from here
Lets Begin:
1. Open your template: Duplicate and close the original
2. Delete the watermark layer and the background layer
3. Image- Canvas size 600x600 with the center button ticked
4. Highlight our hearts layer
5. Selections- Select all- Float-Defloat
6. Open paper of choice: I used Paper 10 resized by 70%
7. Paste as a new layer on our working image
8. Selections- Invert
9. Hit delete once on your keyboard
10. Select None
11. Eye Candy 6 – Text Selection- Bevel Choose the Stretched Plastic setting
12. Adjust Brightness and contrast Brightness at 10 contrast at 0 (Or your choosing)
13. Highlight the shape layer
14. Selections- Select all- Float-Defloat
15. Open paper of choice: I used Paper 03 resized by 60%
16. Paste as a new layer on our working image
17. Selections- Invert
18. Hit delete once on your keyboard
19. Highlight the circle shape layer
20. Selections- Select all- Float-Defloat
21. Open paper of choice: I used Paper 03 resized by 60%
22. Paste as a new layer on our working image
23. Selections- Invert
24. Hit delete once on your keyboard
25. Delete the circle shape layer
26. Arrange our layers so it goes
27. Raster 1, raster 2 and raster 3 from top to bottom
28. Highlight raster 1 (our hearts) and add a drop shadow 0(0,0,100,7 black)
29. Hide this layer
30. Merge raster 2 and 3 visible
31. Click in the center of this shape
32. Open paper of choice I used paper 8 resized by 65%
33. Paste as a new layer on our working image
34. Selections- Invert
35. Delete the excess paper
36. Drop shadow the frame (the shape) (0, 0, 100, 7, black)
37. Add your tube at this time and crop the excess
38. Open Gem splatter and resize by 60%
39. Paste on to our working image as a new layer
40. Move this to the top left of our image
41. Arrange layers moving this to the bottom
42. Duplicate- Image- Mirror
43. Open Heart tag01 resize by 50%
44. Paste as a new layer on our working image placing it below our heart layer and add a drop shadow
45. Open bow 02 resizing by 50% and paste as a new layer placing to your liking
46. Drop Shadow
47. Open paper of choice
48. Paste as a new layer and move to the bottom
49. Apply mask of choice.
50. At this time add any more embellishments you would like at this time
51. Add your copyrights and save as a PNG
No comments:
Post a Comment