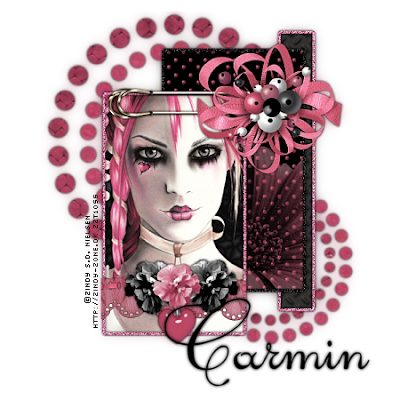
This tutorial is for those that have a working knowledge of PSP. This tutorial was written by me on the 13th day of September 2010 and any resemblance is purely coincidental. I used PSP 9, but any version should work. I do not allow my tutorials to be translated and please do not claim them as your own. If you would like to share the tutorial please send a link to my blog.
Supplies Needed:
• Tube of Choice: I am using the work of the very talented Zindy Nielsen You can purchase her work Here Please do not use her work without the proper license!
• Scrapkit: Im using the Plush PTU kit from the wonderful Juicy Bits which can be purchased Here
• Template: I am using Template100 from Missy which can be found here.
Shall we begin?
1. Open your template and delete the watermark layer
2. Highlight the circle layer
3. Selections—select all—float—defloat
4. Paste paper09 as a new layer and resize only the paper layer by 50%
5. Selections- Invert- Delete
6. Delete the "circle layer"
7. Highlight circle 2 layer
8. Selections—select all—float—defloat
9. Paste paper04 as a new layer resize by 50%
10. Selections – invert- delete
11. Delete the original circle 2 layer
12. Repeat this process with layers Circle 3 and circles 4 (using papers of choice) I used the same papers flopping them around!
13. Now repeat the process again for our rectangle layers using papers of choice.
14. Now let's add a drop shadow to our circle layers
15. Drop shadow settings: 0,0,100,5, black
16. Now we are going to add a border to all of our rectangle layers
17. Selections—Select all—Float—Defloat
18. Selections—Modify—Add Selection borders
19. Fill each border with a color of your choice ( I used black and a shade of pink)
20. Add noise to each border
21. Gaussian, 80%, monochrome checked
22. Now we want to add our tube within the borders of the top rectangle
23. Crop the excess parts of the tube off so it fits nicely
24. Add drop shadow to your tube layer
25. Add pin01 to the top of our frame
26. Add your drop shadow once again
27. Add ribbon01 to the bottom of our frame and delete the excess once again
28. Resize flowers to your liking and place them along the top of our ribbon
29. Add any additional elements at this time
30. Delete the background layer
31. Add your copyrights
32. Save as a PNG and we are done
No comments:
Post a Comment