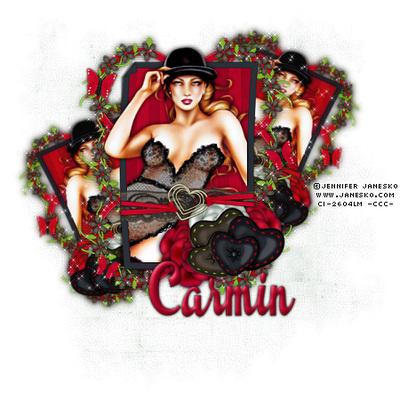
This tutorial is for those that have a working knowledge of PSP. This tutorial was written by me on the 7th day of September 2010 and any resemblance is purely coincidental. I used PSP 9, but any version should work. I do not allow my tutorials to be translated and please do not claim them as your own. If you would like to share the tutorial please send a link to my blog.
The materials you will need:
Scrap kit: I used A Taggers Scrap Elegant Formal Taggers Kit which you can find at Sophisti-scraps
Tube of Choice: I am using the work of the talented: Jennifer Janesko You cannot use her work without a license but you can purchase a license from CILM
Plugin: Jeux de lignes –Enterlacement
Mask of Choice
Shall we Begin?
1. Open a new image 600x600; transparent
2. Open frame2.png and resize by 50%
3. Paste as a new layer on our working image
4. Rotate to the left 90 degrees
5. Click inside the frame with your magic ward
6. Selections- Modify- Expand by 3
7. Open paper 16.jpg and resize by 60%
8. Paste as a new layer and move to fit the frame
9. Selections- Invert – hit delete on your keyboard
10. Move this layer below our frame layer
11. Selections—Select none
12. Place your tube at this time to your liking
13. Open Lace4.png and resize by 50%
14. Paste as a new layer and using your point to point tool select the excess and hit delete on your keyboard
15. Select None
16. Repeat steps 13-15 with heart wrap of your choice
17. Choose 2 hearts of your liking and resize both by 50% twice
18. Paste each as a new layer on the bottom right of our frame
19. Open red circle frame
20. Resize by 50%
21. Paste as a new layer to the right of our frame
22. Send layer to the bottom
23. Duplicate –Image mirror (make sure both frames are to your liking and merge these two layers visible
24. Duplicate and move to the middle
25. Duplicate again and move to the top ( look at my tag for placement)
26. Merge the 3 red frame layers together
27. Duplicate and on the copy blur this layer
28. Adjust—blur—Gaussian blur 5
29. Apply the plugin Jeux de lignes –Enterlacement with the default settings
30. Now apply any extra elements of your choosing
31. Merge all layers visible
32. Duplicate
33. Resize the top layer by 75 %
34. Move to the right of our main layer
35. Send to the bottom
36. Duplicate- Image mirror and move to the bottom left of our main image
37. Merge bottom two layers together
38. Duplicate
39. Blur the top layer using Gaussian Blur 5.00
40. Change this layers opacity to soft light
41. Merge all layers visible
42. Open paper 21 and paste as a new layer
43. Move this layer to the bottom
44. Apply mask of your choosing
45. That's it!!! We are through!!! I would love to see your results…
No comments:
Post a Comment