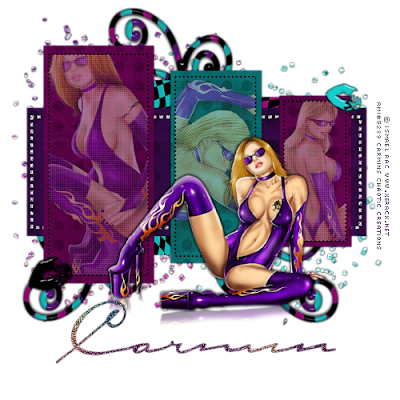
This tutorial is for those that have a working knowledge of PSP. This tutorial was written by me on the 13th day of September 2010 and any resemblance is purely coincidental. I used PSP 9, but any version should work. I do not allow my tutorials to be translated and please do not claim them as your own. If you would like to share the tutorial please send a link to my blog.
Supplies Needed:
- Template: Template 25 by AquaRebel315 which can be found here
- 4 Tubes of Choice: I'm using the work of Ismael Rac which you can purchase here ( I purchased mine at AMI, which is now gone)
- Scrap Kit: I'm using the PTU Skull Funk kit by Missy of Scraps with Attitude which can be purchased here.
1. Open our template and delete the credits layer
2. Highlight raster 9
3. Selections—Select all—Float—defloat
4. Paste paper2 as a new layer
5. Selections—invert
6. Now hit delete on your keyboard
7. Delete original raster 9 layer
8. Repeat steps 2-7 for all of our other template layers choosing different papers to your liking
9. Now highlight raster5 this is our grey dots
10. Adjust- Add noise 80% Gaussian monochrome checked
11. Now we have all of our layers with papers
12. We need to add a drop shadow to all layers
13. Drop shadow settings : 0,0,100,2 black
14. Now we want to add our tubes to the 3 top rectangles
15. I used 3 different tubes but You can use one tube and just put different portions of the tube in each rectangle
16. Lower the opacity of each tube between 40-60 (to your liking)
17. Apply penta filter dot and cross
18. Now paste your main tube to your liking as well
19. Add a drop shadow
20. Open Skull lips 4 and resize by 30% twice!
21. Paste as a new layer and post to your liking
22. Using the other skull lips you can put those to your liking as well
23. Open Glitter of choice resize by 70% twice and send to the bottom
24. Move to the left of our tag
25. Repeat with another glitter but move to the bottom right of our tag
26. Now you can add the other glitter if you choose to do so
27. Open doodle 2 and resize to your liking placing below our glitter layers
28. Add any other elements of choice at this time
29. Add your copyright at this time
30. Delete the background layer and merge visible
31. Export as a transparent PNG
No comments:
Post a Comment