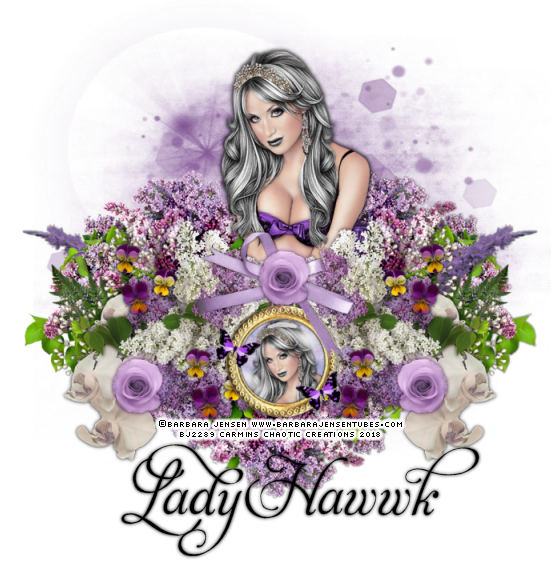
This tutorial is
for those that have a working knowledge of PSP. This tutorial was written by me
on August 12, 2018 and any resemblance is purely coincidental. I use PSP 9, but
any version should work. I do not allow my tutorials to be translated and please
do not claim them as your own. If you would like to share the tutorial, please
send a link to my blog. Thank you!
Things Needed:
·
Tube/Image of choice: August’s Sheena Pike Bonus tube for
spending 10.00 or more on her tubes in the month of August only available at CDO
·
Kit of choice: IB Sheena Pike August 2018 kit by
LadyHawwk Designs which is for sale at CDO
·
Plugins: Muras
Meister Copies, BkG Designer sf10 I, Tramages- Tow The Line
·
Masks: None
·
Template: None
·
Font of Choice: I used Dhanikans Signature
·
Animation, or other items used: none
Let’s Begin:
1.)
Open a new transparent image 851 x 351 72DPI (this will
be referred to as our working image and, we can resize once we are done with
our tag. It just gives us more room just in case!)
2.)
Open your tube and paste as a new layer on our working
image
3.)
Muras Meister- Copies- Wallpaper rotate- default settings
(the entire canvas should be covered now)
4.)
Adjust- Blur- Gaussian Blur- radius 10
5.)
Effects- BkG Designer sf10 I Cruncher Default settings
APPLY 3 times
6.)
Duplicate this layer
7.)
Effects- Tramages- Tow the Line- Default settings
8.)
You can move this layer up or down to get the lines to your
liking
9.)
Copy and paste your tube as a new layer
10.)
Resize if you would like
11.)
Duplicate this
layer
12.)
On the top copy
Adjust- Blur- Gaussian Blur radius of 10
13.)
Now playing with
the Opacity Layer properties leave at 100 and change to hard light or one of
your choosing
14.)
Open LHD_IB-Pike-Aug18-bt-Ele6.png
and resize by 60 %
15.)
Paste as a new
layer on out working image
16.)
Move to the bottom
left of your tube and place to your liking
17.)
Duplicate
18.)
Image- Mirror
19.)
Add drop shadow of
your choosing now
20.)
Open LHD_IB-Pike-Aug18-bt-Ele11.png
and resize by 60%
21.)
Copy and paste as
a new layer on our working image and move to the far left and then move the
layer down so the white rose is behind and to the left of the red rose
22.)
Duplicate
23.)
Image- Mirror
24.)
Open LHD_IB-Pike-Aug18-bt-Ele4.png
25.)
Copy and paste as
a new layer on our working image moving to the right of your tube
26.)
Add your drop
shadow
27.)
Open LHD_IB-Pike-Aug18-bt-Ele18.png
28.)
Resize by 60%
29.)
Copy and paste as
a new layer on your working image moving to the left side of your tube
30.)
Add your drop
shadow
31.)
Open LHD_IB-Pike-Aug18-bt-Ele17.png
and resize by 60%
32.)
Paste as a new
layer on our working image
33.)
Move to the left
with the teapot
34.)
Add your drop
shadow once again
35.)
Add any other
elements you would like at this time
36.)
Now we are going
to select the area of our tag that we want to use for out avatar
37.)
Using the
selection tool draw out a square roughly180 x 180 through 200 x 200 (it doesn’t
have to be exact as we will crop it here in a sec
38.)
Once you have a
square around the area that you want to use for your avatar- right click on the
title bar- copy merged
39.)
Now let’s see how
you did on size Image- Canvas Size- I have mine at 185 x 185 with the center
button ticked (choose the size you want it to be here)
40.)
Okay now back to
our timeline working image
41.)
Selections- Select
none
42.)
Highlight the top
layer and add a new raster layer
43.)
Flood fill with a
color of your choosing
44.)
Selections- Select
all- selections- modify
45.)
Contract- by 1
46.)
Tap the delete key
once on your keyboard
47.)
Selections-
modify- contract by 1
48.)
Flood Fill with
another complimentary color
49.)
Selections-
Modify- Contract change it to 3
50.)
Tap delete once
again on your keyboard
51.)
Selections- Select
None
52.)
Open LHD_IB-Pike-Aug18-bt-Paper4.jpg
53.)
Now I put this above
our background layer lowered the opacity to 34 and changed it to Luminance Legacy
54.)
Duplicated and
moved the copy above the tube layer lowered the opacity to 52 and changed the
layer to overlay
55.)
Now bring up your
avatar working image and repeat steps 42-51 on your avatar image and then repeat step 54
56.)
Now with your top
layer selected on both add your drop shadow
57.)
Now add your
credits Please do not use illegal images, Artists need to pay bills too, also
add your name or sayings and you will be finished, I hope you like your results!!
(I would love to see them!)