Paint Shop Pro, Photoshop, Digital Scrapbooking, Friends, Chaos, Love and Creativity
10.28.2010
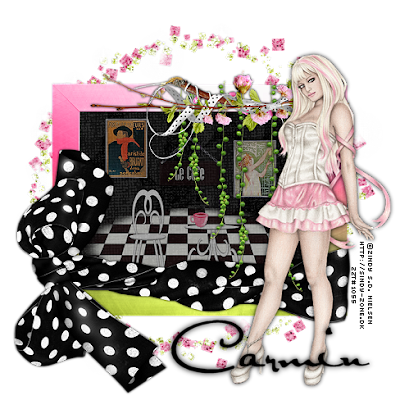
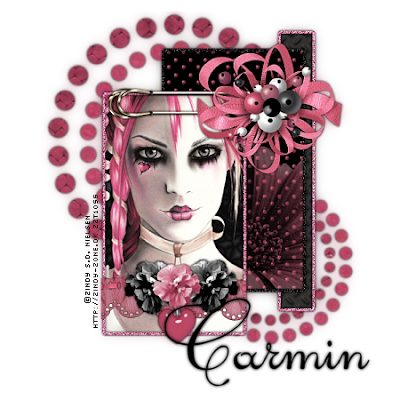
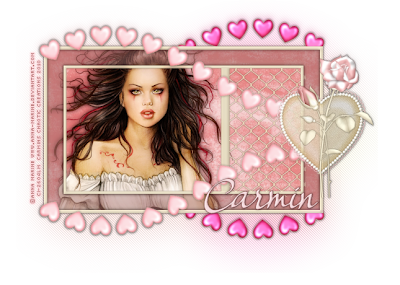
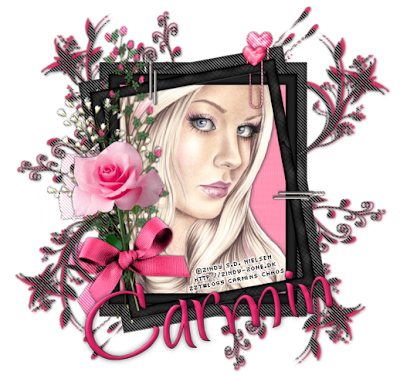
Framed and Floral
This tutorial is for those that have a working knowledge of PSP. This tutorial was written by me on the 27th day of October 2010 and any resemblance is purely coincidental. I used PSP 9, but any version should work. I do not allow my tutorials to be translated and please do not claim them as your own. If you would like to share the tutorial please send a link to my blog.
Supplies needed:
• Tube of Choice: Im using the work of the talented Zindy Nielsen which you can purchase from her shop here
• Scrap Kit of choice: Simply Sassy a FTU lit from Shani of Wicked Princess Scraps
• Plugins: Penta Jeans
Lets Begin
1. Open a new image 600x600
2. Open frame 9 and resize by 80%
3. Paste as a new layer on our working image
4. With magic wand active Click in the center of frame and the open corners
5. Selections – modify – expand by 5
6. Open WP_SS_PP26.jpg
7. Paste as a new layer
8. Selections – Invert
9. Hit delete on your keyboard one time
10. Select none
11. Open your tube at this time
12. Paste as a new layer and move to your liking
13. Add a drop shadow your tube at this time with DS of your liking
14. Open the baby’s-breath and resize by 90%
15. Rotate slightly to the left to go along the edging of our frame
16. Add drop shadow at this time to the baby’s-breath ( I used 0,0,100,5 black)
17. Open flower7 and resize by 85% twice
18. Paste as a new layer on our working image
19. Again rotate to your liking and place with our baby’s-breath
20. Open flower 3 and resize by 85% 3 times
21. Paste as a new layer and rotate slightly to the left again
22. Now place to your liking
23. Add drop shadow once again
24. Open bow 2 and resize by 65%
25. Paste as a new layer on the bottom of our floral arrangement
26. Add any extra elements you may want at this time
27. Merge all layers visible
28. Image resize by 75%
29. Duplicate
30. On this top layer resize by 95%
31. On the bottom layer apply the plugin Penta jeans default settings
32. Open doodle 4 and resize by 85%
33. Paste as a new layer on our working image
34. Move this layer between the two frames
35. Repeat with a doodle of another color but resize this one by 87%
36. Add your copyright and text at this time
Export as a PNG and
That’s it…. Thanks for trying my tut I hope you like your results.
10.27.2010
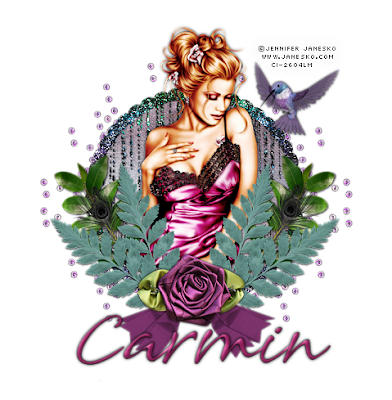
Beautiful Daydreams
This tutorial is for those that have a working knowledge of PSP. This tutorial was written by me on the 27th day of October 2010 and any resemblance is purely coincidental. I used PSP 9, but any version should work. I do not allow my tutorials to be translated and please do not claim them as your own. If you would like to share the tutorial please send a link to my blog.
Supplies needed:
• Tube of Choice: I am using the artwork of the talented Jennifer Janesko which you can purchase from Here from CILM
• Scrap Kit of choice: I am using the PTU Alexandrite from Gemini Creations which you can buy from her store Here.
1. Open a new image 600x600
2. Open gcz-alexandrite-frame05.png and resize by 90%
3. Paste as a new layer on our working image
4. With your magic wand click inside the center of our frame
5. Selections- modify- expand by 5
6. Open paper of choice ( I used gcz-alexandrite-paper01.jpg)
7. Paste as a new layer on our working image
8. Selections- invert
9. Hit delete on your keyboard
10. Select none
11. Move below our frame layer
12. Highlight our frame layer now
13. Open gcz-alexandrite-greenery.png and resize by 75% twice
14. Paste as a new layer on our working image
15. Duplicate
16. Now using your deform tool rotate top one slightly to the right
17. Drop shadow ( I used 2,2, 77, 5 black)
18. Merge the two visible
19. Duplicate this layer
20. Image- Mirror
21. Open gcz-alexandrite-greenery02.png resize by 75% twice
22. Rotate to fit between the other greenery
23. Move below the other greenery layer
24. Duplicate – Image-- Mirror
25. Drop shadow
26. Optional you can also place the feather there as well
27. Open gcz-alexandrite-embel03.png and resize by 65%
28. Paste as a new layer on our working image
29. Place in the center of our greenery
30. Open the bird and resize by 30%
31. Paste as a new layer on our working image
32. Place to your liking
33. Highlight your frame layer
34. Open your tube at this time
35. Resize if necessary
36. Paste as a new layer on our working image
37. Drop shadow your tube
38. Open gcz-alexandrite-embel08.png resize by 30%
39. Paste to your liking at the top left of our working image
40. Send to bottom
41. Duplicate—image mirror
42. Merge down
43. Duplicate again --Image Flip
44. Add any additional elements at this time
45. Merge visible and resize if you want at this time
46. Add your copyright and text
Thank you for trying my tutorial….. Hope you like your results
10.20.2010
Autumn Happenings
This tutorial is for those that have a working knowledge of PSP. This tutorial was written by me on the 20th day of October 2010 and any resemblance is purely coincidental. I used PSP 9, but any version should work. I do not allow my tutorials to be translated and please do not claim them as your own. If you would like to share the tutorial please send a link to my blog.
Supplies needed:
• Tube of Choice: I am using the artwork of the talented Zindy Nielsen which you can purchase from Here
• Scrap Kit of choice: I am using the PTU autumnal Kit from Gemini Creations which you can buy from her store Here.
Plugins Needed:
- Eye Candy 4000 HSB Noise (If you choose to animate)
- Penta- Jeans
Lets Begin:
1. Open a new image 600 x 600 ( You can resize later)
2. Open gcz-autumnal-frame3.png
3. Resize by 75%
4. Copy and paste as a new layer on our working image
5. With your magic wand selected click inside the frame
6. Selections- Modify- Expand by 10
7. Open paper of your choice ( I used gcz-autumnal-paper7.jpg) and copy
8. Paste as a new layer on our working image
9. Selections- Invert
10. Hit delete on your keyboard one time
11. Select None
12. Move this layer below the frame
13. Copy your tube and paste as a new layer
14. Place to your liking and crop any excess
15. Add drop shadow to your tube layer (0,0,100,5 black is the one I used)
16. Open gcz-autumnal-ribbon2.png and resize by 85% TWICE
17. Paste as a new layer on our working image towards the bottom of our frame
18. Open gcz-autumnal-button1.png and resize to your liking
19. Copy and Paste as a new layer on our working image
20. Placing on top of the left side of our ribbon
21. Duplicate this layer
22. Image Mirror and place on the right side of the ribbon
23. Open gcz-autumnal-tree.png and resize by 50%
24. Copy and paste as a new layer on our working image
25. Move this layer below our frame and tube layer Off to the left
26. Duplicate Image Mirror
27. Crop off the excess from the outside of the frame
28. Open gcz-autumnal-leaves1.png and resize by 50%
29. Place to your liking just beneath the ribbon
30. Add drop shadow of choice
31. Duplicate and rotate to the left or right by 22
32. Move and place to your liking
33. Open gcz-autumnal-fallleaves.png
34. Copy and paste as a new layer placing to your liking
( I put mine just above the tube layer to make it look like leaves are falling down as she stands there)
35. Open gcz-autumnal-leaf.png and resize by 50%
36. Copy and paste as a new layer
37. Bring to top
38. Place to the bottom left of our frame and add drop shadow of choice
39. Open the butterfly and resize by 20%
40. Paste as a new layer and place to your liking
41. Duplicate- mirror and move again to your liking
42. Merge all layers visible
43. Duplicate
44. Highlight the bottom layer
45. Adjust blur Gaussian blur radius of 7
46. Effects – Plugins- Penta Jeans at default settings
47. Moving the layer slightly up to expose the lines a little more
48. Lower the opacity of this layer so they are not so dark ( I lowered mine to 28)
49. Merge visible once again
50. Now resize your image if you choose at this time
51. Add any additional elements of your choosing at this time
52. Add copyrights before we move on so we don’t forget
53. Now open the Alpha Set
54. Resize by 20%
55. Clip the letters of your choosing and paste as new layers on our working image
56. Resize again if the letters still appear to large
57. When you are happy with the size and placement of your letters close off everything but the letter layers
58. Merge visible
59. Unhide our other layers now
60. Drop shadow your letters and duplicate twice
61. Starting with the very top layer go to your plugins
62. Eyecandy 4000 HSB Noise
63. Apply at default settings
64. The next layer down repeat the plugin again but hit random seed one time
65. Now the next layer down repeat again hitting random seed once again
66. Hide 2 of the word layers
67. Copy Merged
68. Paste as a new frame in Animation Shop
69. Back to PSP hide word layer and unhide middle word layer
70. Copy Merged
71. Paste after current frame in AS
72. Back to PSP and hide middle word layer
73. Unhide our final layer
74. Copy Merged
75. Paste after current frame in AS
76. Change frame properties to 25 to slow animation down and save as a gif
77. That’s it we are finished….
Thank you for trying my Tutorial….
10.15.2010
Its Electrifying
This tutorial is for those that have a working knowledge of PSP. Any resemblance is purely coincidental. I used PSP 9, but any version should work. I do not allow my tutorials to be translated and please do not claim them as your own. If you would like to share the tutorial please send a link to my blog.
Things Needed:
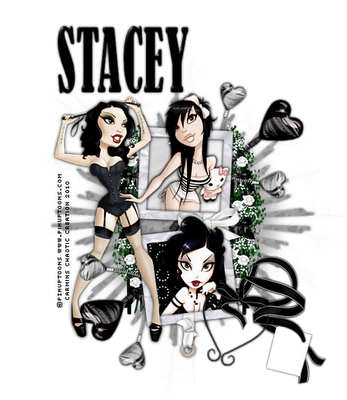
• Here comes the Bride FULL SIZE kit by Staceys Designs which is sold at Scraps with Attitude
• Tube of Your choice I am using Pinuptoons with a license from CILM
• Alien Skin Xenofex 2 Electrify
Lets Begin:
1. Open a New transparent 650x650 canvas ( we can resize later)
2. Open SD Frame 1.png
3. Resize by 30%
4. Resize again by 50%
5. Click inside the top square of our frame with our magic wand
6. Selections-modify expand by 10
7. Open paper of choice ( I used SD Paper 5.jpg)
8. Resize by 20 % and copy
9. Paste as a new layer on our working image
10. Move to your liking
11. Selections—invert and hit delete once on your keyboard
12. Repeat steps 5-11 for the bottom square of the frame but use a different paper ( I used SD Paper 4.jpg)
13. Make sure to move our paper layers below our frame
14. Open SD Black Journal Heart.png
15. Resize by 40% TWICE
16. Paste on our working image
17. Image mirror and place to your liking
18. Place your tubes and copyright at this time
19. Open SD Black Sprial Heart.png and resize by 50% twice
20. Paste on our working image and slightly to the right
21. Move this layer to the bottom
22. Duplicate this layer
23. Image Mirror—Image Flip
24. Open SD Spiral Heart.png
25. Resize by 30% and then again by 75%
26. Paste as a new layer on our working image
27. Again move to your liking
28. Open SD Paper 8.jpg and paste as a new layer
29. Move this layer to the bottom
30. Apply mask of choice
31. I used a mask numbered 25 (Not sure where it came from)
32. Merge group
33. Adjust—Brightness and Contrast –Brightness 20 Contrast 0
34. Repeat step 33 two more times
35. Adjust—plugins xenofex 2 electrify changing the settings to:
36. Under the basic tab: 88.05,122.74,22,60,60,60, radiate from center checked
37. Under the glow tab: change both colors to white Unless you want another color
38. do this twice
39. Now add any other elements of your choosing
40. That's it we are finished….
Date Night
This tutorial was written by me Carmin of, Carmins Chaos on the 28th day of June. Any resemblance is completely coincidental and definitely not intended. Please do not copy my tutorials and claim them as your own, nor do I allow my tutorials to be translated.
Materials needed:
Scrap Kit Date Night by Wicked Princess which is a PTU kit which can be purchased Here or Here
Tube of choice: I am using art © Elias Chatzoudis which can be purchased from
MPT
Open a new image 600x600 transparent
Open the Paper circle frame
Copy and paste on to our new working image
Click in the center of your frame with your magic wand
Selections- Modify- Expand by 6
Open paper of your choosing and paste as a new layer
Selections- Invert
Hit delete on your keyboard one time
Now move your paper layer below the frame
Add your tube to make it look like its coming out of the frame.
Open WP_DN_BAUBLES.png resize by 60%
Paste as a new layer on our working image and move slightly to the right
Duplicate – Image- Mirror
Merge layer down
Duplicate
And now flip
Merge down once again
Move below the frame layer
Image resize by 80 % again
Drop shadow 0, 0,100 3 black shadow on new layer Unchecked
At this time you will add any elements of your choice….
Add your text and copyrights
Save as a PNG and your done…
Sophisticated
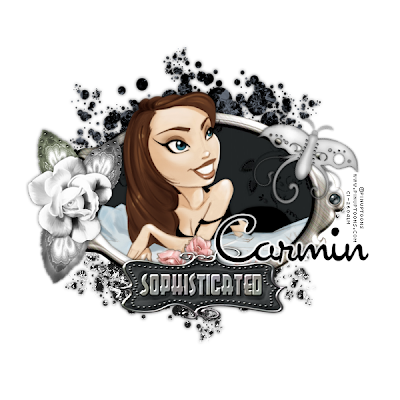
This tutorial is for those that have a working knowledge of PSP. This tutorial was written by me on the 22nd day of July 2010 and any resemblance is purely coincidental. I used PSP 9, but any version should work. I do not allow my tutorials to be translated and please do not claim them as your own. If you would like to share the tutorial please send a link to my blog.
The materials you will need:
Scrap kit: I used JuicyBits PTU kit Sophisticated which you can find here
Tube or tubes of choice: I chose the artwork of Pinuptoons and a license is required to use his work. You may purchase one from CILM.
Lets Begin:
Open Frame 01 Hit Shift D on the keyboard
Close the original
rotate all layers to the right 90 degrees
Image-Canvas size 600x600
Click inside the frame and expand your selection by 5
Open tube of your choosing
Paste tube as a new layer to your liking
Selections- Invert
Hit delete on your keyboard
Do not deselect
Open paper of choice (I used paper02)
Paste as a new layer
Hit delete on your keyboard one time and move this layer to the bottom
Open leaf 01 and leaf 02
Resize one by 60% and leave the other one
Copy and paste as a new layer to the left side of our frame
Flip one of the leaves Moving it to line up with the other leaf ( look at tag for placements)
Open flower 04 and resize by 50% and then again by 80% move to the left side placing on top of the leaves.
Open Glitter Spray 1 and rotate to the left by 90 degrees
Resize by 60% and copy
Paste as a new layer moving slightly to the top
Now move this layer to the bottom so that the glitter looks like its coming out from behind our frame
Open glitter spray 02 rotate to the left by 90%
Resize by 60% copy and paste as a new layer moving this one to the bottom as well
Image mirror
Add drop shadow of your choosing to all layers ( I used 0,0, 100,7 black)
Open WA1 and resize by 60%
Paste as a new layer on our working image and put on the center-bottom of our frame
Open butterfly 01 (or 02) and resize by 50%
Copy and paste as a new layer off to the right side of our frame.
Add any other elements of choice at this time….
Export as a PNG and that’s it we are done…..
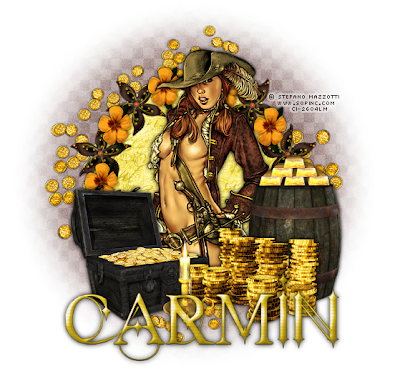
A Pirates Life
This tutorial is for those that have a working knowledge of PSP. This tutorial was written by me on the 24th day of July 2010 and any resemblance is purely coincidental. I used PSP 9, but any version should work. I do not allow my tutorials to be translated and please do not claim them as your own. If you would like to share the tutorial please send a link to my blog.
The materials you will need:
Scrap kit: I used Buried Treasure PTU by Wicked Princess which you can find HERE or HERE
Tube or tubes of choice: I chose the artwork of Stefano Mazzotti and a license is required to use his work. You may purchase one from CILM.
Mask of choice.
Plugins Needed:
Muras Meister Copies
Lets Begin:
Open a new blank canvas 700 x 700 ( we can resize later)
Open WP_BT_DOODLEFLOWER.png resize by 50% twice
Paste as a new layer on our working image
Add drop shadow of your choosing
Apply Muras Meister Copies and chenage the setting to Encircle and change the first number to 10
Select inside our newly made frame and make sure to select all the crooks and crevices
Open paper WP_BT_PP9.jpg resize by 50 % and paste as a new layer
Selections- Invert
Hit delete one time on your keyboard.
Lower the opacity on this layer to your choosing I had mine set at 54
Selections- Invert again and flood fill our bottom layer with white
Selections Select none
Highlight the top layer
Open WP_BT_FRAGGAPINI.png
Resize by 50% twice and then by 75% once
Paste as a new layer and move in between one of our current flowers on our frame
Duplicate and place until you have completed all the way around our frame
Close off layers 1, 2, and 3 (our bottom layers) and merge all of our new flower layers together
Unhide layers 1 2 and 3 now
Open your tube and place to your liking
Open WP_BT_COINSTACK.png and resize by 50% and paste to the right of our frame
Open WP_BT_BARRELL.png and resize by 50% and paste as a new layer and move just off to the right again and move this layer below our coinstack
Open WP_BT_BURIEDTREASUREBOXSIDE.png and resize by 50% and paste as a new layer off to the left
Open WP_BT_COINSPLATTER.png and resize by 60% paste as a new layer and send to bottom
Sharpen once
Duplicate this layer
Image Flip
Open paper of choice and paste as a new layer again sending to the bottom
Apply mask of your choice
Add your copyright and text of choice and any other elements you may like at this time
That’s it we are finished thank you for trying my tutorial.
I would love to see your results…
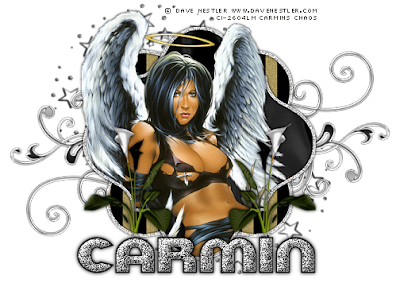
Chrome Angel
This tutorial is for those that have a working knowledge of PSP. This tutorial was written by me on the 24th day of July 2010 and any resemblance is purely coincidental. I used PSP 9, but any version should work. I do not allow my tutorials to be translated and please do not claim them as your own. If you would like to share the tutorial please send a link to my blog.
The materials you will need:
Scrap kit: I used Elegant Soiree PTU by Wicked Princess which you can find HERE or HERE
Tube or tubes of choice: I chose the artwork of Dave Nestler and a license is required to use his work.
You may purchase one from CILM.
WSL Mask 217 Found HERE
Lets Begin:
Open a new image 700 x 700
Open WP_ES_GLITTERFRAME.png and resize by 60%
Duplicate this layer and rotate to the right by 45%
Highlight the first frame layer and click inside the frame
Selections-- Modify-- expand by 3
Open Paper WP_ES_PP13.jpg resize by 60% and paste as a new layer
Selections- Invert and hit delete on the keyboard
Move this layer below the frame and select none
Add a drop shadow to your bottom frame ( I used 0,0, 100, 5 black)
Highlight our top frame layer
Click inside the frame
Selections-- Modify-- expand by 3
Open Paper WP_ES_PP7.jpg and resize by 60%
Paste as a new layer
Selections-- invert
Hit delete on your keyboard and move this layer below our frame
Add your drop shadow again
Open your tube and paste as a new layer at this time, move to your liking.
Open WP_ES_LILY.png and resize to your liking moving to the lower left hand corner of our bottom frame to make it look like the lilies are coming from inside the frame
Duplicate this layer and mirror
Open WP_ES_SILVERDOODLE.png and resize by 50% paste as a new layer and send to the bottom
Add drop shadow of your choice
Duplicate this layer- Image Mirror - Image Flip
Open WP_ES_SILVERCURLYSWIRL.png resize by 60%
Paste as a new layer and place to your liking
Arrange and send to the bottom
Add a drop shadow
Duplicate again image mirror and image flip
Open paper of choice Paste as a new layer
Send to the bottom and apply mask of choice
( I used WSL Mask 217, and then merged group resized it by 75% and moved to the top left and then duplicated the layer and mirrored and flipped the duplicate layer.)
Add any other elements at this time and add Your copyright and text.
That’s it we are done …. Simple right???
I would love to see your results....
Rockin Pink Love Buzz
This tutorial is for those that have a working knowledge of PSP. This tutorial was written by me on the 7th day of August 2010 and any resemblance is purely coincidental. I used PSP 9, but any version should work. I do not allow my tutorials to be translated and please do not claim them as your own. If you would like to share the tutorial please send a link to my blog.
The materials you will need:
• Scrap kit: I used Juicy Bits Love Buzz Kit which you can find here
• Tube of choice: I am using the work of the talented Ismael Rac You must have a license to use his work and you can get one here
• Template: Im using template103 by Missy. You can download this template and many others here
• Eye Candy 6 Bevel
• Mask of Choice: I used WSL_Mask254 which you can get from here
Lets Begin:
1. Open your template: Duplicate and close the original
2. Delete the watermark layer and the background layer
3. Image- Canvas size 600x600 with the center button ticked
4. Highlight our hearts layer
5. Selections- Select all- Float-Defloat
6. Open paper of choice: I used Paper 10 resized by 70%
7. Paste as a new layer on our working image
8. Selections- Invert
9. Hit delete once on your keyboard
10. Select None
11. Eye Candy 6 – Text Selection- Bevel Choose the Stretched Plastic setting
12. Adjust Brightness and contrast Brightness at 10 contrast at 0 (Or your choosing)
13. Highlight the shape layer
14. Selections- Select all- Float-Defloat
15. Open paper of choice: I used Paper 03 resized by 60%
16. Paste as a new layer on our working image
17. Selections- Invert
18. Hit delete once on your keyboard
19. Highlight the circle shape layer
20. Selections- Select all- Float-Defloat
21. Open paper of choice: I used Paper 03 resized by 60%
22. Paste as a new layer on our working image
23. Selections- Invert
24. Hit delete once on your keyboard
25. Delete the circle shape layer
26. Arrange our layers so it goes
27. Raster 1, raster 2 and raster 3 from top to bottom
28. Highlight raster 1 (our hearts) and add a drop shadow 0(0,0,100,7 black)
29. Hide this layer
30. Merge raster 2 and 3 visible
31. Click in the center of this shape
32. Open paper of choice I used paper 8 resized by 65%
33. Paste as a new layer on our working image
34. Selections- Invert
35. Delete the excess paper
36. Drop shadow the frame (the shape) (0, 0, 100, 7, black)
37. Add your tube at this time and crop the excess
38. Open Gem splatter and resize by 60%
39. Paste on to our working image as a new layer
40. Move this to the top left of our image
41. Arrange layers moving this to the bottom
42. Duplicate- Image- Mirror
43. Open Heart tag01 resize by 50%
44. Paste as a new layer on our working image placing it below our heart layer and add a drop shadow
45. Open bow 02 resizing by 50% and paste as a new layer placing to your liking
46. Drop Shadow
47. Open paper of choice
48. Paste as a new layer and move to the bottom
49. Apply mask of choice.
50. At this time add any more embellishments you would like at this time
51. Add your copyrights and save as a PNG
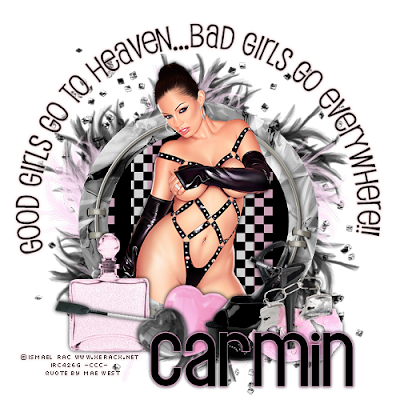
Bad Girls
This tutorial is for those that have a working knowledge of PSP. This tutorial was written by me on the 15th day of October 2010 and any resemblance is purely coincidental. I used PSP 9, but any version should work. I do not allow my tutorials to be translated and please do not claim them as your own. If you would like to share the tutorial please send a link to my blog.
Supplies needed:
• Tube of Choice: I am using the artwork of the talented Ismael Rac which you can purchase from Here
• Scrap Kit of choice: I am using the PTU Playtoy Kit from Missy of Scraps with Attitude which you can buy here.
Lets Begin:
1. Open a new transparent image 600 x 600
2. Now open Playtoy_RoundFrame2.png and resize by 50%
3. Click in the center of our frame with your magic wand
4. Selections- Modify Expand by 10
5. Open paper of choice and paste as a new layer
6. Selections- Invert
7. Hit delete on your keyboard
8. Select none
9. Move this layer below the frame
10. Open your tube at this time
11. Paste as a new layer and move to your liking
12. Open playtoy feathers 2
13. Resize by 50 % and again by 70%
14. Muras Meister copies- Encircle default settings EXCEPT Change the “Number” to 6
15. Optional :Open the pink playtoy feathers and repeat steps 13 and 14 but change the number to 5
16. Send both of the feather layers to the bottom
17. Open the perfume bottle and resize to your liking
18. Paste as a new layer moving to the left of our tag
19. Open glass heart 3 and 4 resize by 15% ( you may have to resize again)
20. Paste to your liking near the bottom of our tag and rotate each one in opposite directions
21. Open the shoe and resize to your liking
22. Paste as a new layer to the right of our tag
23. Open fuzzy handcuffs and resize by 20% and place to the bottom right
24. Open playtoy whip and place to your liking across the bottom of our tag
25. Open the glitter of choice and paste as a new layer
26. Send to the bottom
27. Add your copyrights and text
That’s it we are done….I hope you have enjoyed this tut....
Pretty In Pink
This tutorial is for those that have a working knowledge of PSP. This tutorial was written by me on the 15th day of October 2010 and any resemblance is purely coincidental. I used PSP 9, but any version should work. I do not allow my tutorials to be translated and please do not claim them as your own. If you would like to share the tutorial please send a link to my blog.
Supplies needed:
• Tube of Choice: I am using the artwork of the talented Zindy Nielsen which you can purchase from Here
• Scrap Kit of choice: I am using the PTU Paris Kit from A Taggers Scrap which you can buy from here.
Lets Begin:
1. Open a new image 600 x 600
2. Open frame 5.png and resize by 75%
3. Paste as a new Layer on our new working image
4. Click in the center of our frame
5. Selections- Modify- Expand by 15
6. Open paper of choice and paste as a new layer
7. Selections- Invert
8. Hit delete on your keyboard one time
9. Move this layer below our frame
10. Open deo branch and resize by 75%
11. Paste as a new layer on our working image
12. Move right edge up against the right side of frame
13. Open wrap6 and resize by 75%
14. Paste as a new layer and move to the bottom of our frame
15. Open frame3a.png and paste as a new layer
16. Send to the bottom
17. Open lecafe and resize by 50%
18. Move below our frame layer
19. Open your tube at this time
20. Paste as a new layer
21. Place to your liking
22. Add your copyrights at this time
That’s it rather quick and simple… yet elegant
Cherish Life
This tutorial is for those that have a working knowledge of PSP. This tutorial was written by me on this 8th day of August 2010 and any resemblance is purely coincidental. I used PSP 9, but any version should work. I do not allow my tutorials to be translated and please do not claim them as your own. If you would like to share the tutorial please send a link to my blog.
The materials you will need:
• Scrap kit: I used Juicy Bits Angelic PTU Kit which you can find here
• 2 tubes of choice I used the work of Pinuptoons you must have a license to use his work and can purchase one from CILM
Lets Begin:
1. Open a new image 600x600
2.Open frame06 and frame07 resize both by 65%
3.Paste frame06 as a new layer and slightly rotate to the left
4.Paste frame07 as a new layer to the right of our other frame and rotate slightly to the right
(look at my tag for reference)
5.Now you will want to use your selection tool (point to point, feather 1) and select the top frame where it overlaps and select it then hit delete on your keyboard once.
6.Merge visible
7.Select inside our brown frame with our magic wand
8.Selections- Modify- Expand by 3
9.Open paper 3 and paste as a new layer
10.Selections-Invert
11.Hit delete once on your keyboard
12.Now select inside our red frame with your magic wand
13.Selections- modify-Expand by 3
14.Paste paper14 as a new layer
15.Selections- Invert
16.Hit delete once on your keyboard and move this layer to the bottom
17.Open one of the roses and resize by 50% and paste as a new layer on our working image
18.Open leaf two and resize to your liking
19.Paste as a new layer and slightly rotate them to your liking (look at my tag for reference)
20.I duplicated them to my liking and changed the color of one on each side to a green leaf
21.Add your tubes within the frames
22.Add a drop shadow to both tubes
23.Add any additional elements at this time. (I added the glitters to the background)
24.Add your name and copyrights.
Purple Diva
This tutorial is for those that have a working knowledge of PSP. This tutorial was written by me on the 14th day of August 2010 and any resemblance is purely coincidental. I used PSP 9, but any version should work. I do not allow my tutorials to be translated and please do not claim them as your own. If you would like to share the tutorial please send a link to my blog.
The materials you will need:
• Scrap kit: I used Juicy Bits Discotheque Kit which you can find here
• Tube of choice: I am using the work of the talented Joel Adams You must have a license to use his work and you can get one from the CILM
Lets begin:
1. Open a new image 600x600
2. Open bottlecap01.png
3. Resize by 50 % twice
4. Copy and paste as a new layer on our working image
5. Effects Plugins:
6. Muras Miester- Copies- Encircle with default settings
7. Paste your tube as a new layer and make it look like its poking out from within the circle
8. Click within the center of our frame with your magic wand
9. Selections Modify expand by 5
10. Paste paper of choice as a new layer ( I used Paper 18)
11. Selections Invert and delete excess paper
12. Highlight our bottle cap layer now and add a drop shadow
13. I used 0,0,100,10 Black
14. Add a nice drop shadow to your tube as well
15. Open Mirror.png
16. Resize by 50% paste as a new layer on our working image
17. Duplicate and resize by 50% again placing to your liking
18. Duplicate once more and place to your liking
19. Open your glitter streak and resize by 50%
20. Duplicate and rotate to your liking (or use muras copies again)
21. Open metalstrip2.png
22. Resize by 40% and paste to your liking on our working Image
23. (I'm using this to put names on)
24. Add any other elements of your choosing
25. Add your name and copyrights at this time
Highlighted Beauty
This tutorial is for those that have a working knowledge of PSP. This tutorial was written by me on the 16th day of August 2010 and any resemblance is purely coincidental. I used PSP 9, but any version should work. I do not allow my tutorials to be translated and please do not claim them as your own. If you would like to share the tutorial please send a link to my blog.
The materials you will need:
• Scrap kit: I used A Taggers Scrap Asian Dreams Kit which you can find here
• Tube of choice: I am using the work of the talented Jennifer Janesko You must have a license to use her work and you can get one from CILM
• Mask of choice: I used WSL_Mask253 which you can find here
Lets Begin:
1. Open a new image 600 x 600 transparent
2. Open frame4.png
3. Resize by 70% and paste as a new layer on our working image
4. Click inside the frame with your magic wand
5. Selections- Modify- Expand by 5
6. Open paper of choice ( or frayedfabric.png)
7. Paste as a new layer on our working image
8. Selections- Invert
9. Hit delete on your keyboard
10. Move this layer below our frame
11. Highlight the frame layer and add a drop shadow
12. I use the following drop shadow
13. (0, 0, 100, 4, Black)
14. Paste your tube as a new layer and place to your liking
15. Open Poppy1
16. Resize by 50%
17. Paste as a new layer and move below your tube layer but sticking out to the right of it.
18. Add your drop shadow
19. Open Poppy 2
20. Resize by 50%
21. Paste as a new layer placing to the right again, but this time rotate to the right ( Look at my tag as a reference)
22. Add your drop shadow
23. Open twigdeco.png
24. Resize by 50%
25. Paste as a new layer to the right with our poppy flowers placing to your liking
26. Open Ribbon one and paste as a new layer
27. Move this layer to the very top and resize by 85%
28. Image- Mirror
29. Place to your liking and crop the excess ribbon off on the right side
30. Open tassel2 and resize by 50% paste to the bottom left with our bow cropping bits and pieces of the loop
31. To make them look like they are connected
32. Repeat with tassel4
33. Open Flower2 and resize by 30% paste in the center of our bow
34. Add your drop shadow
35. Merge Visible
36. Duplicate layer
37. Highlight the top layer
38. Adjust- Blur- Gaussian Blur with a radius of 3
39. Change the top layer opacity to hard light and bring down to 62%
40. Add any additional elements at this time
41. Merge visible again
42. Open deco.png
43. Resize by 90 %
44. Paste as a new layer and move below our tag
45. Open Paper 11 and paste as a new layer
46. Move this to the bottom
47. Apply mask and merge group
48. Merge visible again
49. Resize your image at this time
50. Add your copyrights and Text
Thank you for trying my tutorial….. I hope you like your results!!!
Flower Princess
This tutorial is for those that have a working knowledge of PSP. This tutorial was written by me on the 18th day of August 2010 and any resemblance is purely coincidental. I used PSP 9, but any version should work. I do not allow my tutorials to be translated and please do not claim them as your own. If you would like to share the tutorial please send a link to my blog.
The materials you will need:
• Scrap kit: I used A Taggers Scrap Spring Bling Mega Taggers Kit which you can find here
• Tube of choice: I am using the work of the talented Juicy Bits You must have a license to use her work and you can get one from HERE
Lets Begin:
1. Open a New Image 600x600
2. Open Bracket3.png
3. Click inside the bracket frame
4. Selections-modify-expand by 5
5. Open Paper 18 and paste as a new layer
6. Selections- invert
7. Hit delete on your keyboard just once
8. Move this layer below our bracket layer
9. Open your Juicy Bit tube and paste as a new layer to your liking
10. Open Flower 3 and resize by 50% and sharpen place on the bottom right
11. Open flower 6 and paste as a new layer
12. Move this layer below our tube layer
13. Rotate to your liking
14. Duplicate (as many as you would like moving them to your liking, or look at my tag for reference)
15. Open leaves2.png
16. Resize by 45%
17. Paste as a new layer on our working image
18. Duplicate
19. Move to your liking
20. Add a drop shadow now to all of your flowers and leaves layers
21. Drop shadow 0,0,100,3 Black
22. Open knot 2 and resize by 75%
23. paste as a new layer moving below our multi colored flower
24. Open knot 3 and resize by 75%
25. Image- Mirror
26. Image- Flip
27. Paste as a new layer to the bottom left of our multicolored flower
28. Drop shadow both of the knot layers
29. Open Frame4.png and resize by 95% TWICE
30. Paste as a new layer and send to the bottom
31. Add drop shadow to this layer
32. Merge visible and add your copyright and text
Thank you so much for trying my tutorial and I hope you like your results
All About Me
This tutorial is for those that have a working knowledge of PSP. This tutorial was written by me on the 20th day of August 2010 and any resemblance is purely coincidental. I used PSP 9, but any version should work. I do not allow my tutorials to be translated and please do not claim them as your own. If you would like to share the tutorial please send a link to my blog.
The materials you will need:
• Scrap kit: I used Juicy Bits Excite PTU Kit which you can find here
• Tube of choice: Im using the talented Leigh Youngs artwork which you must purchase a license in order to use and you can do so here from Mistaken Art.
• Template of choice: I am template27 by Debs Scrap Designs which is now Creative By Nature which can now be found here
Lets Begin:
1. Open your template and delete the copy right layers
2. Select your text layer and go to Selections- Select All
3. Float -Defloat-Invert
4. Paste your paper as a new layer (I used paper04.jpg)
5. Hit delete on your keyboard
6. Select none
7. Add drop shadow to our text layer at this time
8. 0, 0, 100, 2 Black
9. Delete the original text layer
10. Select raster 2
11. Selections- float- defloat
12. Open paper of choice- I used paper 11
13. Paste as a new layer
14. Selections- invert
15. Hit delete once on your keyboard
16. Select raster 3
17. Selections- float- defloat
18. Paste paper of choice as a new layer – I used paper 15
19. Selections- invert
20. Hit delete on your keyboard
21. Repeat steps 17-20 for raster 4
22. Merge layers visible
23. Resize the canvas 800x600
24. Move our image to the right of this layer
25. Paste your tube as a new layer moving it to the left of our tag
26. Add a drop shadow to your tube
27. Open bow04.png and paste as a new layer at the bottom of our tube
28. Open butterflies.png
29. Paste as a new layer
30. And rotate slightly to the left
31. Move to the top right corner of our tag
32. Open your glitter spray and resize by 75%
33. Paste as a new layer towards the top of our tag
34. Send this layer to the bottom
35. Duplicate
36. Image flip
37. Add any extra elements at this time
38. Merge all layers visible
39. Duplicate
40. Adjust blur Gaussian blur 6
41. Change this layer to hard light and lower opacity to your liking
42. That's it thanks for trying my tutorial.
10.14.2010
Irrisistible Desires
This tutorial is for those that have a working knowledge of PSP. This tutorial was written by me on the 14th day of October 2010 and any resemblance is purely coincidental. I used PSP 9, but any version should work. I do not allow my tutorials to be translated and please do not claim them as your own. If you would like to share the tutorial please send a link to my blog.
Supplies needed:
• Tube of Choice: I am using the artwork of the talented Renee Biertempfel which you must have a license to use and you can obtain from CILM.
• Scrap of Choice: Im using the PTU kit Forbidden Love by Kris of Mystical Illisionz which you can get from Twilight Scraps.
Lets Begin:
1. Open a new image 600 x 600
2. Open MIZ-frame2.png and resize by 70%
3. Paste as a new layer on our new working image
4. With you magic wand click on the transparent area outside of the frame
5. Selections- Invert
6. Modify- contract by 10
7. Open paper of choice ( I used Paper 9 )
8. Paste as a new layer on our working image
9. Selections- Invert
10. Hit delete one time on your keyboard
11. Select none
12. Move this paper layer below our frame
13. Now with your magic wand click on the circle inside of the frame
14. Selections- Modify- Expand by 10
15. Open another paper of choice ( I used paper 15)
16. Paste as a new layer on our working image
17. Selections- invert
18. Hit delete on your keyboard
19. Select none
20. Move this layer below our frame again
21. Open tube of choice placing to your liking
22. Open the candle element
23. Resize by 50%
24. Paste as a new layer and move to the left of our frame
25. Duplicate the candle and move down just a tad and to the right
26. Open MIZ-bow.png and resize to your liking and place towards the center bottom of the frame
27. Open the rose of choice
28. Resize by 60 % and paste as a new layer
29. Move to the left of our bow
30. Duplicate
31. Image mirror
32. Open glitters and resize
33. Paste to your liking behind our frame and paper layers duplicating if necessary
34. Add any additional elements of your choosing at this time
35. Add text and copyrights
36. That’s it we are done…
10.11.2010
Slowly but hey its happening
I am slowly getting my tutorials back on here.... Its taking some time because I have school work and things to get done too.... but I got 9 on here today and one of those is a new one.... so woot woot!! Just updating and letting you all know where I stand at the moment....
Elegant Janesko
This tutorial is for those that have a working knowledge of PSP. This tutorial was written by me on the 7th day of September 2010 and any resemblance is purely coincidental. I used PSP 9, but any version should work. I do not allow my tutorials to be translated and please do not claim them as your own. If you would like to share the tutorial please send a link to my blog.
The materials you will need:
Scrap kit: I used A Taggers Scrap Elegant Formal Taggers Kit which you can find at Sophisti-scraps
Tube of Choice: I am using the work of the talented: Jennifer Janesko You cannot use her work without a license but you can purchase a license from CILM
Plugin: Jeux de lignes –Enterlacement
Mask of Choice
Shall we Begin?
1. Open a new image 600x600; transparent
2. Open frame2.png and resize by 50%
3. Paste as a new layer on our working image
4. Rotate to the left 90 degrees
5. Click inside the frame with your magic ward
6. Selections- Modify- Expand by 3
7. Open paper 16.jpg and resize by 60%
8. Paste as a new layer and move to fit the frame
9. Selections- Invert – hit delete on your keyboard
10. Move this layer below our frame layer
11. Selections—Select none
12. Place your tube at this time to your liking
13. Open Lace4.png and resize by 50%
14. Paste as a new layer and using your point to point tool select the excess and hit delete on your keyboard
15. Select None
16. Repeat steps 13-15 with heart wrap of your choice
17. Choose 2 hearts of your liking and resize both by 50% twice
18. Paste each as a new layer on the bottom right of our frame
19. Open red circle frame
20. Resize by 50%
21. Paste as a new layer to the right of our frame
22. Send layer to the bottom
23. Duplicate –Image mirror (make sure both frames are to your liking and merge these two layers visible
24. Duplicate and move to the middle
25. Duplicate again and move to the top ( look at my tag for placement)
26. Merge the 3 red frame layers together
27. Duplicate and on the copy blur this layer
28. Adjust—blur—Gaussian blur 5
29. Apply the plugin Jeux de lignes –Enterlacement with the default settings
30. Now apply any extra elements of your choosing
31. Merge all layers visible
32. Duplicate
33. Resize the top layer by 75 %
34. Move to the right of our main layer
35. Send to the bottom
36. Duplicate- Image mirror and move to the bottom left of our main image
37. Merge bottom two layers together
38. Duplicate
39. Blur the top layer using Gaussian Blur 5.00
40. Change this layers opacity to soft light
41. Merge all layers visible
42. Open paper 21 and paste as a new layer
43. Move this layer to the bottom
44. Apply mask of your choosing
45. That's it!!! We are through!!! I would love to see your results…
Punky Pink
This tutorial is for those that have a working knowledge of PSP. This tutorial was written by me on the 13th day of September 2010 and any resemblance is purely coincidental. I used PSP 9, but any version should work. I do not allow my tutorials to be translated and please do not claim them as your own. If you would like to share the tutorial please send a link to my blog.
Supplies Needed:
• Tube of Choice: I am using the work of the very talented Zindy Nielsen You can purchase her work Here Please do not use her work without the proper license!
• Scrapkit: Im using the Plush PTU kit from the wonderful Juicy Bits which can be purchased Here
• Template: I am using Template100 from Missy which can be found here.
Shall we begin?
1. Open your template and delete the watermark layer
2. Highlight the circle layer
3. Selections—select all—float—defloat
4. Paste paper09 as a new layer and resize only the paper layer by 50%
5. Selections- Invert- Delete
6. Delete the "circle layer"
7. Highlight circle 2 layer
8. Selections—select all—float—defloat
9. Paste paper04 as a new layer resize by 50%
10. Selections – invert- delete
11. Delete the original circle 2 layer
12. Repeat this process with layers Circle 3 and circles 4 (using papers of choice) I used the same papers flopping them around!
13. Now repeat the process again for our rectangle layers using papers of choice.
14. Now let's add a drop shadow to our circle layers
15. Drop shadow settings: 0,0,100,5, black
16. Now we are going to add a border to all of our rectangle layers
17. Selections—Select all—Float—Defloat
18. Selections—Modify—Add Selection borders
19. Fill each border with a color of your choice ( I used black and a shade of pink)
20. Add noise to each border
21. Gaussian, 80%, monochrome checked
22. Now we want to add our tube within the borders of the top rectangle
23. Crop the excess parts of the tube off so it fits nicely
24. Add drop shadow to your tube layer
25. Add pin01 to the top of our frame
26. Add your drop shadow once again
27. Add ribbon01 to the bottom of our frame and delete the excess once again
28. Resize flowers to your liking and place them along the top of our ribbon
29. Add any additional elements at this time
30. Delete the background layer
31. Add your copyrights
32. Save as a PNG and we are done
Punked Out
This tutorial is for those that have a working knowledge of PSP. This tutorial was written by me on the 13th day of September 2010 and any resemblance is purely coincidental. I used PSP 9, but any version should work. I do not allow my tutorials to be translated and please do not claim them as your own. If you would like to share the tutorial please send a link to my blog.
Supplies Needed:
- Template: Template 25 by AquaRebel315 which can be found here
- 4 Tubes of Choice: I'm using the work of Ismael Rac which you can purchase here ( I purchased mine at AMI, which is now gone)
- Scrap Kit: I'm using the PTU Skull Funk kit by Missy of Scraps with Attitude which can be purchased here.
1. Open our template and delete the credits layer
2. Highlight raster 9
3. Selections—Select all—Float—defloat
4. Paste paper2 as a new layer
5. Selections—invert
6. Now hit delete on your keyboard
7. Delete original raster 9 layer
8. Repeat steps 2-7 for all of our other template layers choosing different papers to your liking
9. Now highlight raster5 this is our grey dots
10. Adjust- Add noise 80% Gaussian monochrome checked
11. Now we have all of our layers with papers
12. We need to add a drop shadow to all layers
13. Drop shadow settings : 0,0,100,2 black
14. Now we want to add our tubes to the 3 top rectangles
15. I used 3 different tubes but You can use one tube and just put different portions of the tube in each rectangle
16. Lower the opacity of each tube between 40-60 (to your liking)
17. Apply penta filter dot and cross
18. Now paste your main tube to your liking as well
19. Add a drop shadow
20. Open Skull lips 4 and resize by 30% twice!
21. Paste as a new layer and post to your liking
22. Using the other skull lips you can put those to your liking as well
23. Open Glitter of choice resize by 70% twice and send to the bottom
24. Move to the left of our tag
25. Repeat with another glitter but move to the bottom right of our tag
26. Now you can add the other glitter if you choose to do so
27. Open doodle 2 and resize to your liking placing below our glitter layers
28. Add any other elements of choice at this time
29. Add your copyright at this time
30. Delete the background layer and merge visible
31. Export as a transparent PNG
Let Your Love Flow
This tutorial is for those that have a basic working knowledge of PSP. This tutorial was written by me on the 19th day of September 2010 and any resemblance is purely coincidental. I used PSP 9, but any version should work. I do not allow my tutorials to be translated and please do not claim them as your own. If you would like to share the tutorial please send a link to my blog.
Supplies Needed:
--Tubes of Choice: I'm using the work of Anna Marine which you can purchase at CILM
--Scrap Kit: Im using the PTU Clearly Yours kit by Juicy Bits which you can purchase here.
--Plugins: Muras Meister Copies and Penta Jeans
Lets Begin:
1. Open a new image 600 x 600 ( you can resize later if you choose)
2. Open Frame02.png
3. Resize by 75%
4. Paste as a new layer on our working image
5. Using Your Selection tool draw a rectangle around our frame
6. Open Paper 2 and paste as a new layer
7. Selections-- Invert hit delete on your keyboard
8. Paste your tube as a new layer within our frame to your liking
9. now hit delete one more time
10. Add a drop shadow to your tube layer, and frame layer
11. I used drop shadow Settings 0,0,75,2 Black
12. Open heart of Choice and resize 10%
13. Effects-- Plugins-- Muras Meister with the following settings
14. Wave (horizontal) with its default setting
15. crop off excess hearts ( ones going past the frame)
16. duplicate
17. Image flip
18. Repeat steps 12-16 with another heart but after placement send to bottom
19. Open Heart06 and resize by 50%
20. Move to the center right of our frame
21. Add drop shadow of your choice
22. Merge Visible
23. Duplicate
24. Adjust Blur Gaussian Blur 25
25. send to the bottom
26. Effects-- Plugins-- Penta-- Jeans
27. Amount 62 Border width 4
28. Merge all visible
29. Add Text of choice at this time and copyrights
Cheers
This tutorial is for those that have a working knowledge of PSP. This tutorial was written by me on the 22nd day of September 2010 and any resemblance is purely coincidental. I used PSP 9, but any version should work. I do not allow my tutorials to be translated and please do not claim them as your own. If you would like to share the tutorial please send a link to my blog.
Supplies Needed:
Tubes of Choice: I'm using the work of Jessica Dougherty which you can purchase here
Scrap Kit: Im using the PTU Cherries and Fairies kit by Mystical Illusionz which can be purchased here.
Shall we Begin?
1. Open a new image 600x600 (we can resize later)
2. Open MIZ_JD_frame1.png
3. Resize by 50%
4. Paste as a new layer on our new working image
5. Using your magic wand with the feather settings at 2
6. Click in the center of the frame
7. Paste paper of your choosing as a new layer
8. Selections—Modify expand by 2
9. Selections—Invert
10. Hit delete on your keyboard
11. Move this layer below our frame
12. Now using the magic wand click the outer frame ring
13. Add a New raster layer
14. At this time fill with a color from your tube
15. Move this layer to the bottom
16. Add noise 20%
17. Open your Tube
18. Copy and paste as a new layer
19. Place to your liking (resize if Necessary)
20. Add a drop shadow to your frame now
21. Also drop shadow your tube if you would like
22. Open twisted Ribbon of choice
23. Paste as a new layer on your working image
24. Now the choice is yours you can leave it over the whole tube or you can
25. Crop your tube out to your liking
26. Open cherries of choice resize by 50%
27. Paste as a new layer ( depending on your tag you may need to resize a little more)
28. Image flip
29. Muras Meister Copies with the settings of encircle
30. Paste some flowers to your liking
31. Merge all visible
32. Add your copyrights and text at this time
That's it we are done! Hope you like your results!
Natures Blossom
This tutorial is for those that have a working knowledge of PSP. This tutorial was written by me on the 22nd day of September 2010 and any resemblance is purely coincidental. I used PSP 9, but any version should work. I do not allow my tutorials to be translated and please do not claim them as your own. If you would like to share the tutorial please send a link to my blog.
Supplies Needed:
• Tubes of Choice: I'm using the work of Genniday Koufay which you can purchase here
• Scrap Kit: I'm using the PTU Midsummers Dreams kit by StacieCakes which can be purchased here.
Lets Begin!!!
1. Open a new image 600 x 600
2. Now open SC_MSD_Frame1.png and SC_MSD_Frame1.png resizing both by 75%
3. Paste both as a new layer
4. With your selection tool feather set to 10 or higher draw areas of lines or circles on the top layer
5. Hit delete on your keyboard
6. You should now have the two tone effect on your frame
7. Merge all layers visible
8. Open Leaves 2 and resize by 20%
9. Paste as a new layer on our working image
10. Erase bits and pieces to make it look like its wrapped around our frame ( repeat steps 8-10 to your liking)
11. Open paper of choice (I used SC_MSND8.jpg)
12. Paste as a new layer on our working image
13. Resize by 50%
14. Send to bottom
15. Crop off excess pieces
16. Add your tube at this time
17. Now you can add the patch of grass behind your tube to make it have the meadow behind look
18. Open flowers 1 and 2 and resize both by 7% (or to your liking)
19. Pasting them as new layers place to your liking
20. Repeat until you are satisfied with your flowers
21. Add any additional elements to your liking at this time
22. Add your copyrights and text
I Want Candy
This tutorial is for those that have a working knowledge of PSP. This tutorial was written by me on the 8th day of October 2010 and any resemblance is purely coincidental. I used PSP 9, but any version should work. I do not allow my tutorials to be translated and please do not claim them as your own. If you would like to share the tutorial please send a link to my blog.
Supplies needed:
• Tube of Choice: I am using the artwork of the talented Juicy Bits which you can purchase from Here
• Scrap Kit of choice: I am using the PTU Hallows Eve Kit from Juicy Bits which you can buy from her store HERE
Lets Begin:
1. Open Frame 02.png
2. Rotate to the left 90% all layers checked
3. Resize all layers by 75%
4. Now resize again by 75% but make sure that all layers is Unchecked
5. Open ribbon07.png
6. Resize by 75% THREE times
7. Rotate to the left 90%
8. Paste as a new layer on our working frame image and move to the left side of our frame
9. You will need to use your selection tool and crop off the excess ribbon
10. Add drop shadow of choice to your ribbon layer ( I used 0,0,100,5,black)
11. Highlight our frame layer
12. With your magic wand click inside of the frame
13. Selections- Modify- Expand by 10
14. Paste paper of choice as a new layer ( I used paper 7)
15. Selections- invert
16. Hit delete on your keyboard
17. Open your tube at this time
18. Resize if necessary to your liking
19. Paste as a new layer moving below our frame
20. Add a drop shadow of your choice
21. Open your candy spatters and resize by 70%
22. Paste to your liking and send this layer to the bottom
23. Duplicate this layer
24. Image Flip
25. Image Mirror
26. Move into place to your liking
27. Open 3 bows of choice ( I used 2,3, and 4)
28. Resize all by 75%
29. Copy first bow
30. Highlight top layer on our working image and paste as a new layer
31. Now select your second bow and paste as a new layer
32. Image Mirror
33. Now your last bow
34. Paste as a new layer but resize again by 75%
35. Now duplicate that layer
36. Now line up your bows on the left ( look at my tag for reference)
37. Open flair of choice I used flair03.png
38. Resize by 30% and again by 75%
39. Paste in the center of our bows
40. Open tag01.png
41. Resize to your liking and paste as a new layer on our working image
42. Move below our flair layer
43. Open pumpkin of choice and resize to fit on our tag
44. Lower the opacity to your liking
45. Add text of choice and copyrights
46. Export as a PNG
We are finished!!!
10.07.2010
Falling to Pieces
This tutorial is for those that have a working knowledge of PSP. This tutorial was written by me on this 7th day of October 2010 and any resemblance is purely coincidental. I used PSP 9, but any version should work. I do not allow my tutorials to be translated and please do not claim them as your own. If you would like to share the tutorial please send a link to my blog.
Supplies needed:
• Tube of Choice: I am using the artwork of the talented Jennifer Janesko which you can purchase from CILM
• Scrap Kit of choice: I am using the PTU kit Widget from Juicy Bits which you can buy from her store HERE
• Template: I am using template138 from Gina’s Gems which you can find Here
Lets Begin:
1. Open your template
2. Delete the credit info layer, bling layer, the flowers layer, rounded rectangle, and the silver swirl layer
3. Using your selection tool, select a rectangular area around the template area
4. Crop to selection
5. This brings our template in a little closer and we can resize when we are finished
6. Highlight our leafy frame layer
7. Selections-Select All- Float
8. Selections defloat
9. Open paper 5 and paste as a new layer
10. Selections- Invert
11. Hit delete on your keyboard one time
12. Now you can delete the original leaf layer (I liked the look so I left it)
13. If you want you can also add textures to your paper if you want it to stand out a bit more
14. Highlight the circle fill layer
15. Selections-Select All- Float
16. Selections defloat
17. Open paper of choice ( I used paper 9)
18. Paste as a new layer
19. Selections- Invert
20. Hit delete on your keyboard
21. Select none
22. Paste your tube to your liking at this time
23. Now duplicate your leaf layer
24. Rotate by 45%
25. Bring the opacity down between 30 and 40 or to your liking
26. Move this layer to the bottom above your background layer
27. Open Brad of choice and resize by 50% 3 or 4 times to your liking
28. Now we will paste as a new layer on to our working image
29. Placing them on the silver ornamental frame
30. Duplicate and place each one to your liking around the frame
31. Drop shadow each bead
32. Open one of your Brackets and resize by 40% and then by 50% and rotate
33. Place to your liking or look at my tag for placement
34. Duplicate Image Mirror
35. Repeat until you have 4
36. Merge these 4 layers visible and drop shadow
37. Open Tag 04 and resize by 50%
38. Paste as a new layer to your liking
39. Add text of choice to the tag
Optional Place puzzle pieces to your liking
40. Merge all layers visible and add copyrights
Thank you for trying my tutorial…. If you have any trouble please feel free to contact me…
10.04.2010
Fixing my Blog
I was aggrivated how different each post looked so I saved everything and will slowly be getting my tuts back on.... Hang in there with me I will do this in free time as I get kits and things worked with and what not. I was getting really irritated with the look of my blog so I will fix it.... ASAP!!!
thanks for understanding!!!
Hugs and Love,
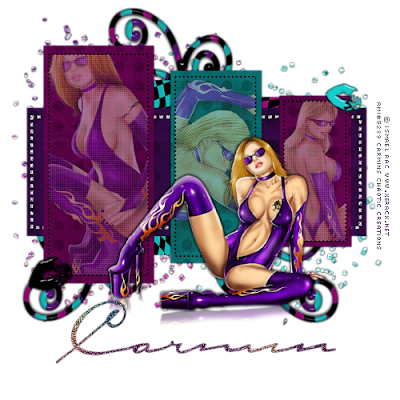
Carmin