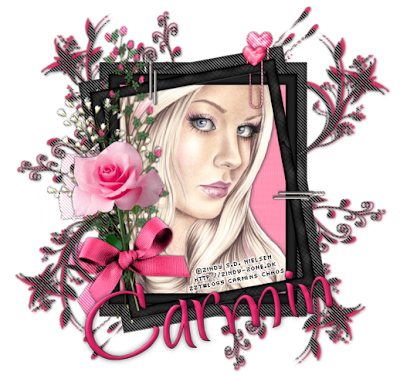
This tutorial is for those that have a working knowledge of PSP. This tutorial was written by me on the 27th day of October 2010 and any resemblance is purely coincidental. I used PSP 9, but any version should work. I do not allow my tutorials to be translated and please do not claim them as your own. If you would like to share the tutorial please send a link to my blog.
Supplies needed:
• Tube of Choice: Im using the work of the talented Zindy Nielsen which you can purchase from her shop here
• Scrap Kit of choice: Simply Sassy a FTU lit from Shani of Wicked Princess Scraps
• Plugins: Penta Jeans
Lets Begin
1. Open a new image 600x600
2. Open frame 9 and resize by 80%
3. Paste as a new layer on our working image
4. With magic wand active Click in the center of frame and the open corners
5. Selections – modify – expand by 5
6. Open WP_SS_PP26.jpg
7. Paste as a new layer
8. Selections – Invert
9. Hit delete on your keyboard one time
10. Select none
11. Open your tube at this time
12. Paste as a new layer and move to your liking
13. Add a drop shadow your tube at this time with DS of your liking
14. Open the baby’s-breath and resize by 90%
15. Rotate slightly to the left to go along the edging of our frame
16. Add drop shadow at this time to the baby’s-breath ( I used 0,0,100,5 black)
17. Open flower7 and resize by 85% twice
18. Paste as a new layer on our working image
19. Again rotate to your liking and place with our baby’s-breath
20. Open flower 3 and resize by 85% 3 times
21. Paste as a new layer and rotate slightly to the left again
22. Now place to your liking
23. Add drop shadow once again
24. Open bow 2 and resize by 65%
25. Paste as a new layer on the bottom of our floral arrangement
26. Add any extra elements you may want at this time
27. Merge all layers visible
28. Image resize by 75%
29. Duplicate
30. On this top layer resize by 95%
31. On the bottom layer apply the plugin Penta jeans default settings
32. Open doodle 4 and resize by 85%
33. Paste as a new layer on our working image
34. Move this layer between the two frames
35. Repeat with a doodle of another color but resize this one by 87%
36. Add your copyright and text at this time
Export as a PNG and
That’s it…. Thanks for trying my tut I hope you like your results.
No comments:
Post a Comment